Moodle has the ability to designate groups within your course. You can have Moodle randomly allocate groups or you can create groups manually. We will show you how to create both in this tutorial.
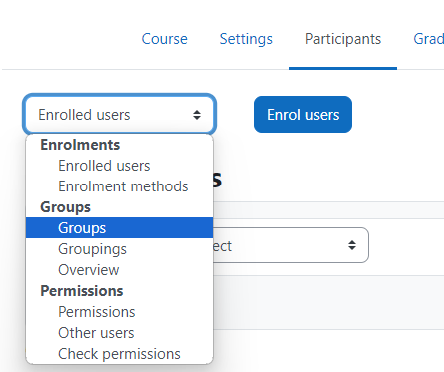
To begin, make sure you are logged into Moodle, have navigated to the course you wish to create groups in, Then click on participants:

from the participants page select the drop down in the upper left hand corner of the page, and choose Groups:
AUTO-CREATING GROUPS
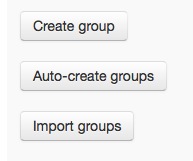
If you would like Moodle to automatically create groups for you, choose Auto-create Groups.
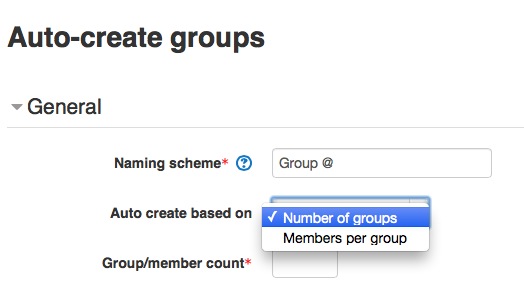
You can give groups a naming scheme or title. Typing Group @ will produce Group A, Group B, Group C etc., while typing Group # will produce Group 1, Group 2, Group 3 etc. You can ask Moodle to select a specific number of groups and Moodle will split the number of enrolled students into the desired number of groups. Or you may instead choose the number of members for each group and Moodle will create groups based on your numbers.
3. Once you have your group settings selected you can choose Preview at the bottom and Moodle will display your auto-created groups.
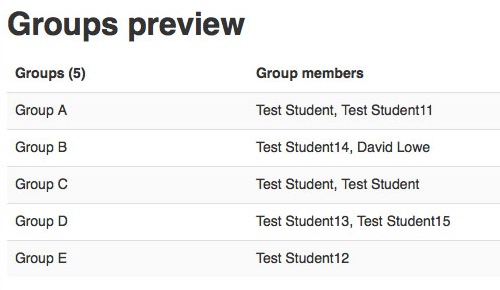
Moodle allows you to preview your group allocation before you submit it. Once you are satisfied, hit Submit to create the group.
MANUALLY CREATING GROUPS
1. If you would prefer to manually create your groups, you may choose Create Group.
2. Give your group a name.

3. Click Save Changes at the bottom.

4. Repeat these steps until you have all your groups created.
5. You will be able to click on your group names on the left side, and choose students on the right side to add or remove by selecting Add/Remove Users once the names are highlighted.
![]()
GROUPINGS
Groupings are essentially clusters of groups.
The best way to understand groupings is via examples.
Examples
- In your course, you have divided your students into 4 groups, each with their own author to research. While groups A and B have different authors, they are both assigned to write in a forum. Groups C and D, also writing on different authors, are instructed to create a Wiki. You might create a Forum Grouping, containing groups A and B, and a Wiki Grouping, containing groups C and D. This will allow the Wiki activity to be available to only the Wiki grouping, but you still have your two Wiki sub-groups, as well - C and D - for an added layer of distinction between the work going on about two different authors.
- Olympic metaphor: at the Olympics, there are different sports (gymnastics, swimming, track, etc.) and many countries represented. There are two ways to think of an Olympian athlete: first, by the sport they compete in, and second, by their nationality. To be part of the United States Olympic Team, you must first be an athlete (swimmer, gymnast, runner, etc.). You cannot be on the US Team without first being an athlete in a specific sport. The sport is your group. Your country is your grouping. You must belong to a group before joining a grouping.
NOTE: When you assign activities for grades using groupings, all activities still end up showing in each student's grade book. Using the first example above, a student in that course would still see a gradebook column for the wiki and the forum, but would only receive an earned mark for one of the activities. An incomplete would appear in the other. This incomplete will factor into their grade unless the gradebook is configured to compensate for this. In this case you could create a category that has both grouping assignments in it. Hide the individual grade items and only show the category total for these assignments. This way they will receive one mark and not two. Also you will have to set this grade category to drop the lowest mark. This causes the Gradebook to only calculate a mark for the activity they were assigned to participate in.
SETTING YOUR MOODLE ACTIVITIES TO USE THESE GROUPS:
Once you have the groups set in your Moodle course, you can then set each item to use those groups as needed.
For this example, we will set a forum to work in groups, but this setting can be set in other activities as well.
Once you have your forum ready, you can go into the forum settings by clicking on the forum, then under the Administration Block, choose Edit Settings.
Under the settings, you will find a section called Common Module Settings, and within this, Group Mode.
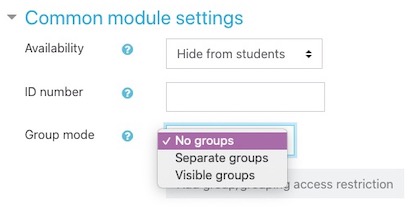
To set the forum into groups, you can choose one of 3 settings.
1. No Groups - this option is the default, and will allow students to post to the forum as individuals in the class and not be set in groups.
2. Separate Groups - this option will allow the students to work in the groups set at the course level. When Separate Groups is chosen, the students will be able to post to their other group members, and can only see their group members postings and no other groups.
3. Visible Groups - this option will also allow the students to work in the groups set at the course level. However, instead of only seeing their own group's postings, they will still be able to only post and reply to their own group, but also see all other group postings as well.